
Just as airlines offer online rebookings, Rezgo users can offer their guests the option of making changes to their own bookings. This is disabled by default. It can be enabled in your settings, and you can configure the types of changes you want to allow.
What you need to know about guest booking editing
If you want to let your guests edit or cancel their own bookings, there are a few steps you’ll need to take.
- You’ll need to enable and configure it in your Rezgo settings.
- You’ll need to configure alerts for guest-edited bookings.
- You should ensure that your options have cancellation windows set.
- You may want to set up your booking edit terms template.
How payments work with guest booking editing
It’s important to keep an eye on your alerts if you enable these settings, because customers won’t automatically be charged or refunded for any change in their booking total. If their booking total increases, you’ll need to send a payment request or take payment when the customer arrives at the event. If the booking total decreases, you’ll need to process a refund.
If you don’t want to make these payment arrangements with your customers or aren’t confident your staff can keep track of who’s paid or who hasn’t (the daily manifest can help), we recommend leaving these settings disabled.
When are customers prevented from editing bookings?
Finally, customers will not be given the option to modify their bookings in these situations:
- Your settings don’t allow bookings to be edited by customers.
- The option has been booked as part of a package, because guest numbers and pricing tiers can affect the availability or pricing of packages.
- The option’s cancellation window has passed.
- The event is in the past or the booking has already been checked in.
- The open-date booking is used or expired.
- The booking is for merchandise.
How to enable guest booking editing in your Rezgo settings
To let your customers edit their own bookings, go to Settings > System Configuration and find the Customer Booking Modification heading.
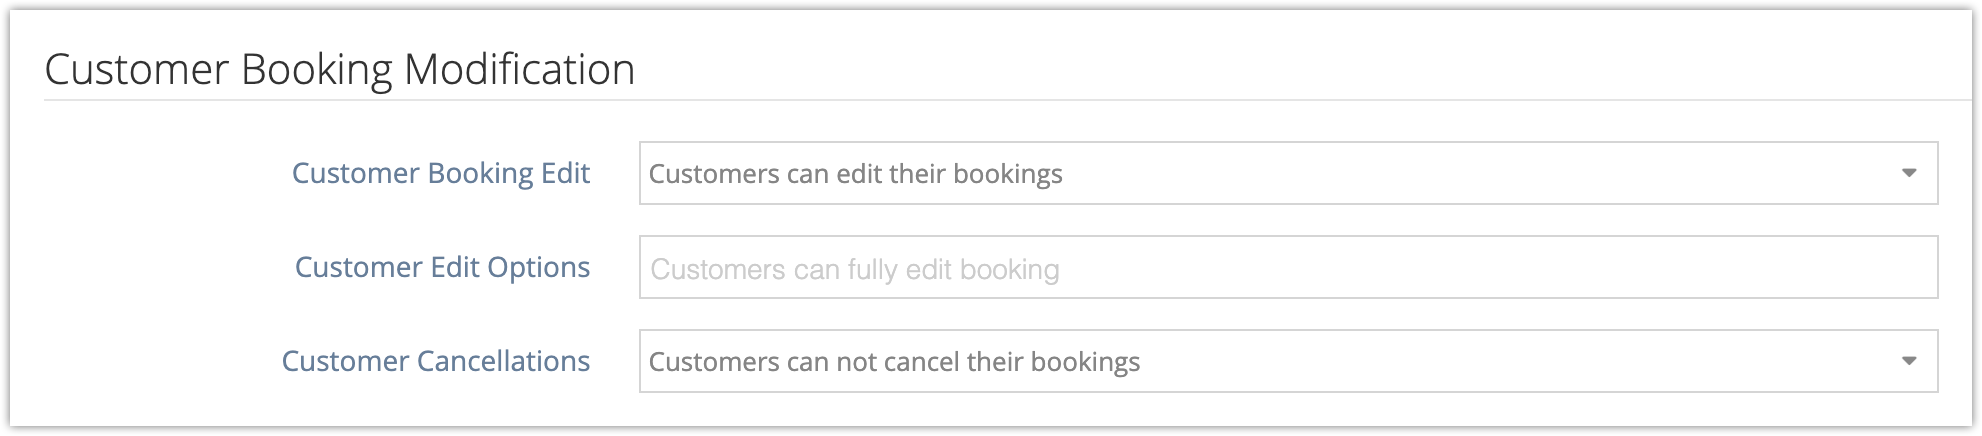
First, decide whether or not guests should be allowed to edit their own bookings.
If so, in the Customer Booking Edit field, select Customers can edit their bookings.

Now, decide what you want them to be able to edit and select it in the Customer Edit Options field.
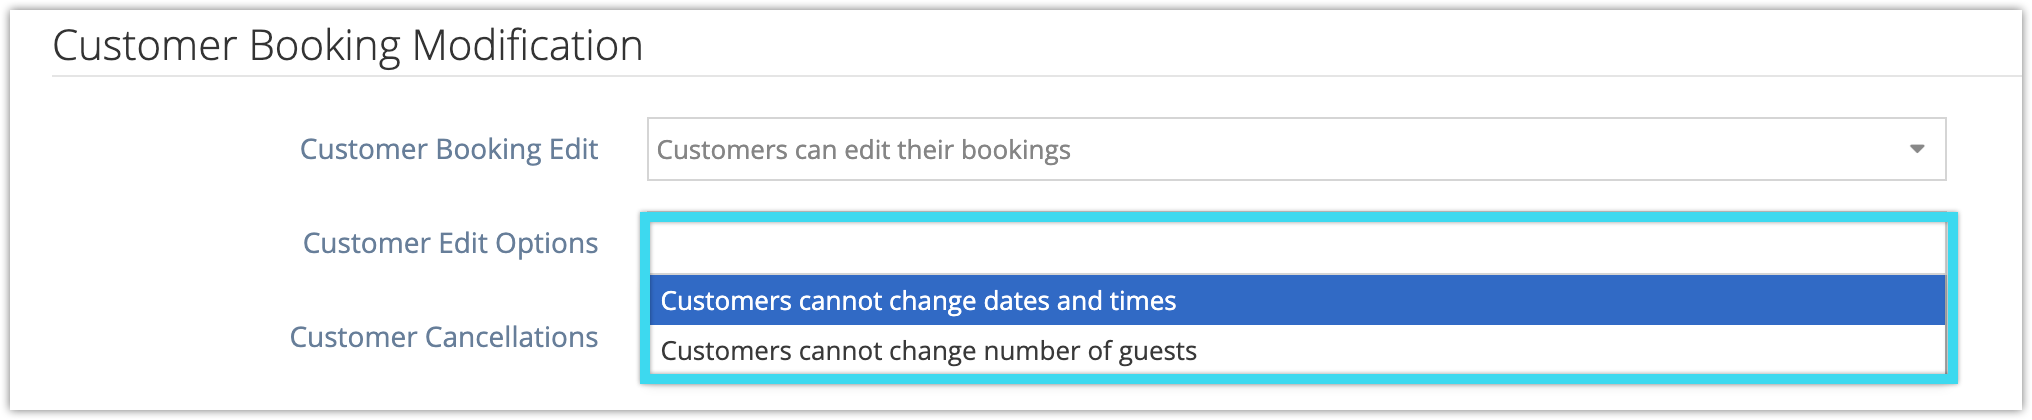
- By default, once enabled, customers can edit booking times, dates, and guests.
- If you only want customers to be able to change the guests, guest information, and custom form answers, select Customers cannot change dates and times.
- If you only want customers to be able to move the booking’s date or time, select Customers cannot change number of guests.
Finally, decide if customers should be able to cancel their own bookings.

- If so, select Customers can cancel their bookings in the Customer Cancellations field
- If not, select Customers cannot cancel their bookings.
How to set up alerts for guest-edited bookings
We know it’s important that you don’t miss a customer modification, so we flag them in a few ways:
- In your system notifications.
- On your dashboard, with ‘modified booking’ stats.
- In your bookings list, with a searchable flag.
- On the booking, just below the booking time.
- In the booking’s history.
By default, Rezgo will also send alerts to the main contact email on the account. You can also set up additional emails, or toggle off this default alert.
Go to Settings > Notifications You Send.
Click Manage Alerts.

Enter any additional emails you want to have alerted under Website Booking Changes.

Click Save Changes.
How to set up cancellation windows for your inventory
Once you enable customer cancellations or editing, it’s very important to have cancellation windows set for your options. If you don’t have a cancellation window on your option, customers will be able to cancel and edit their bookings right up to the event start time without contacting you.
Cancellation windows can be set in date-based and resource-based options’ edit pages, under Availability.
(Because open-date bookings don’t have specific dates, you can’t set a cancellation window on those. Instead, cancellations and editing will be blocked after the booking is used or expires.)
To add a cancellation window, enter a number of hours or days in the Cancel field (1), then select whether you want to use hours or days (2).
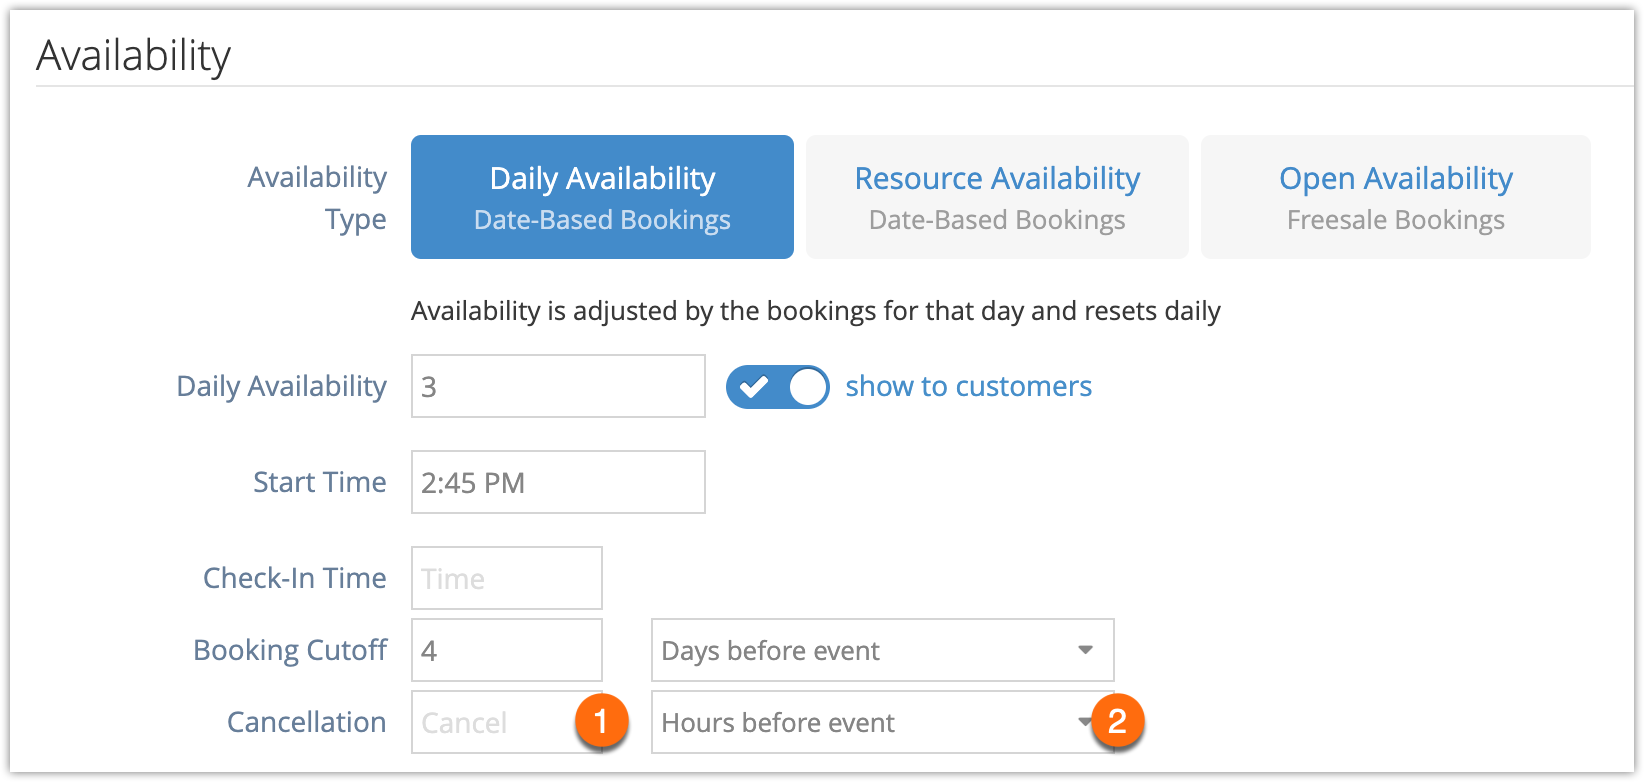
For example, if you set your cancel window to 3 hours, customers won’t be able to cancel or edit their bookings within 3 hours of the event start time.
If customers try to modify their booking in that time, they’ll see a contact form they can use to reach out, instead. Their message will be sent to the emails set up in the alert above.
Click Save Changes when you finish editing your option.
How to set up your booking edit terms
Finally, if you want to include terms and conditions for guest booking editing, you can do so in Settings > Templates.
Find Booking Edit Terms under the Legal heading.
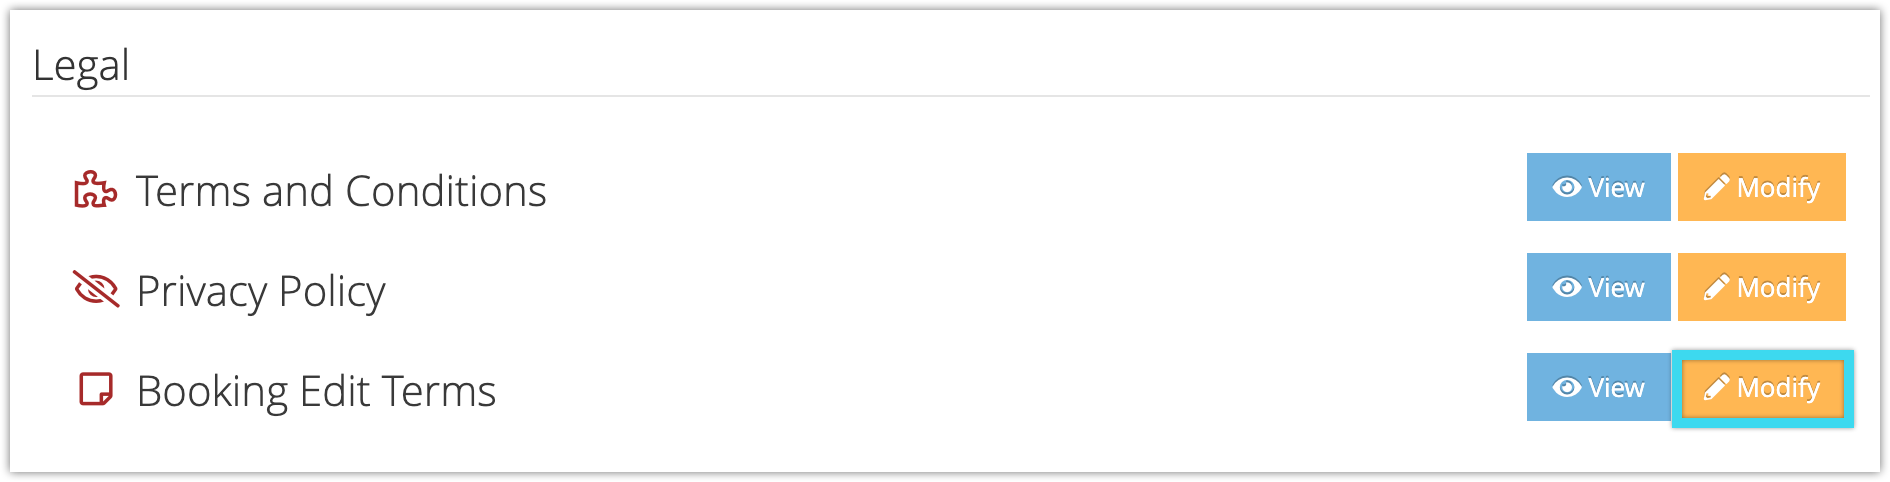
Click Modify.
Any content you include here will be included on the booking modification page. Don’t forget to save your changes when you’re done.
How your guests can modify their bookings
When your guest views their full receipt online, they’ll be shown a screen like this:
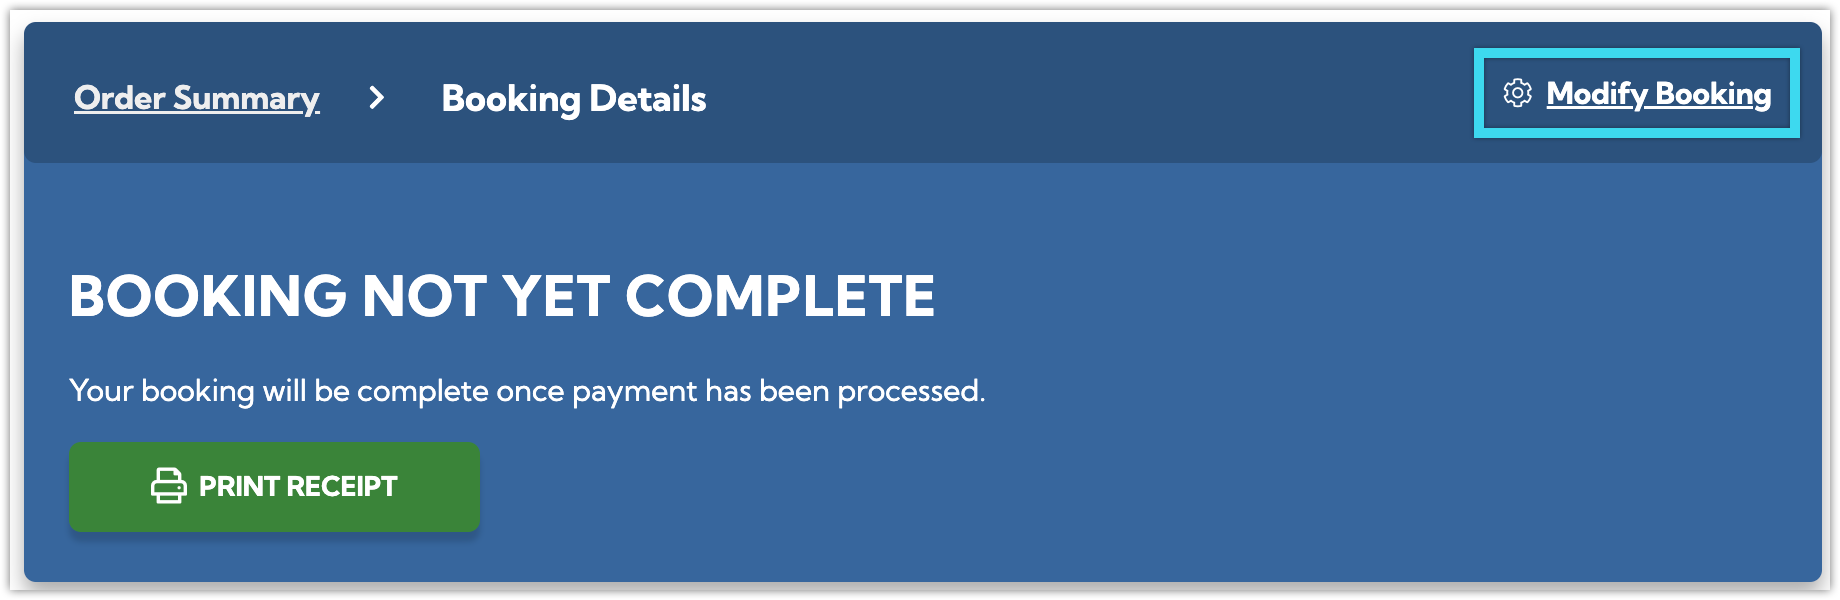
They can click Modify Booking to make changes.
They’ll be presented with a list of choices, depending on what kind of modifications you’ve allowed in your settings.
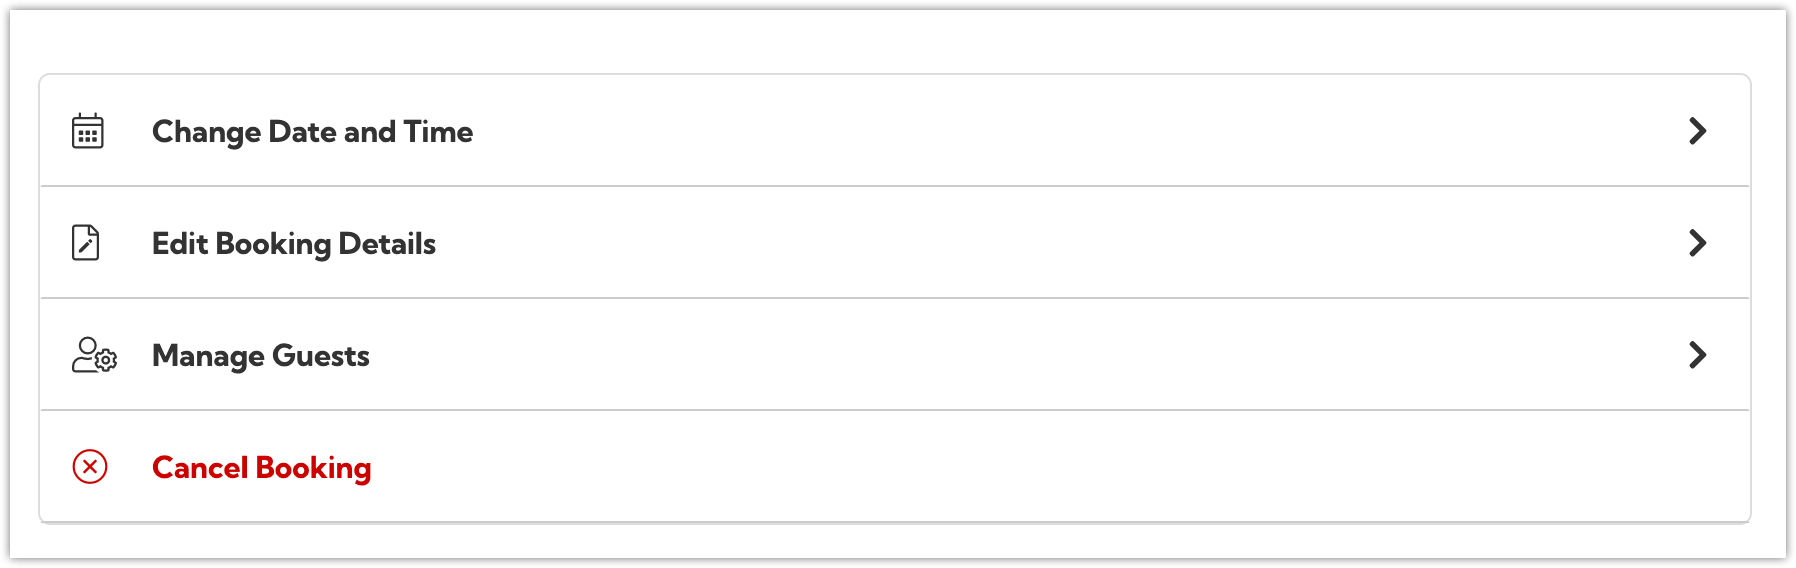
- Change Date and Time lets them move to a different date or start time for the same option.
- Edit Booking Details lets them make changes to their custom form answers. If you don’t have any primary custom forms set for the option, this won’t be shown.
- Manage Guests lets them adjust guest information or add or remove guests.
- Cancel Booking lets them cancel their full booking.
If you’d like to test the interface out for yourself, just make a test booking with your own email address in the contact field. Don’t forget to send notifications if it’s a Point of Sale booking.
When you get the customer receipt, click “Click here to view your full receipt online” or the equivalent if you’ve customized your email content.
From there, you can click Modify Booking and test out these modifications.
Remember to cancel the test booking when you’re done.