Once you create a waiver for an inventory item, any point-of-sale or website orders that include that item will also include a waiver to be signed by the customer.
If you only collect one signature per order, follow the instructions below. If you collect signatures for each guest, you can find more details here.
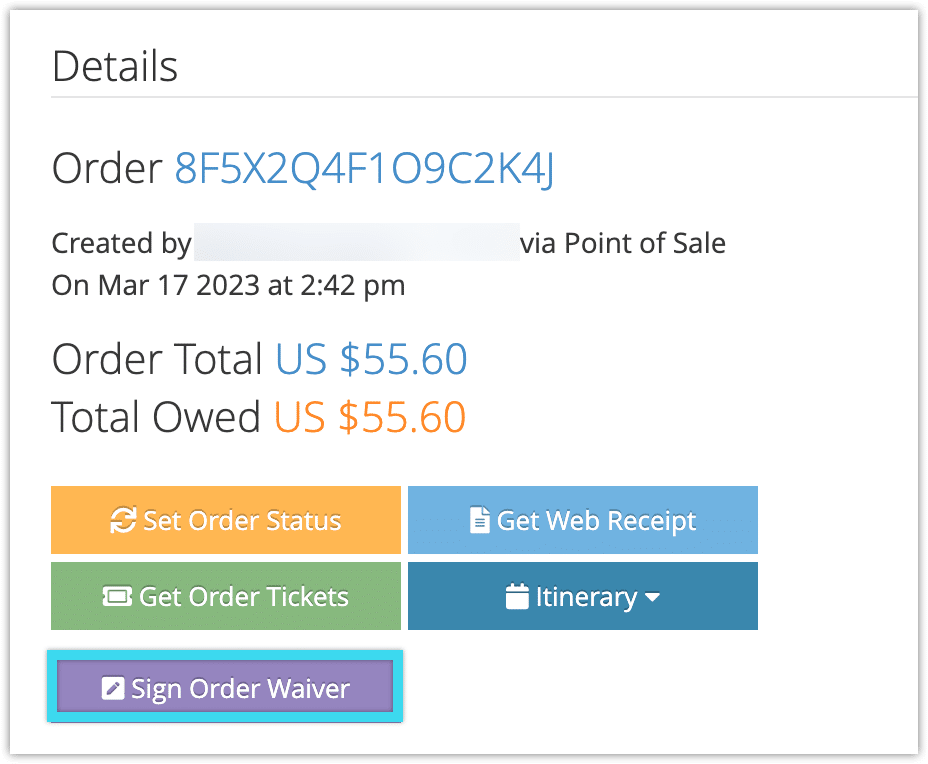
First, navigate to the order’s details page.
1. Click Sign Order Waiver.
2. Show the customer the waiver.
3. The customer should tap Sign Waiver once they have read the waiver.
– If there are any initials requested on the waiver, they will first need to tap Click here to initial, initial the space provided, and click Save.
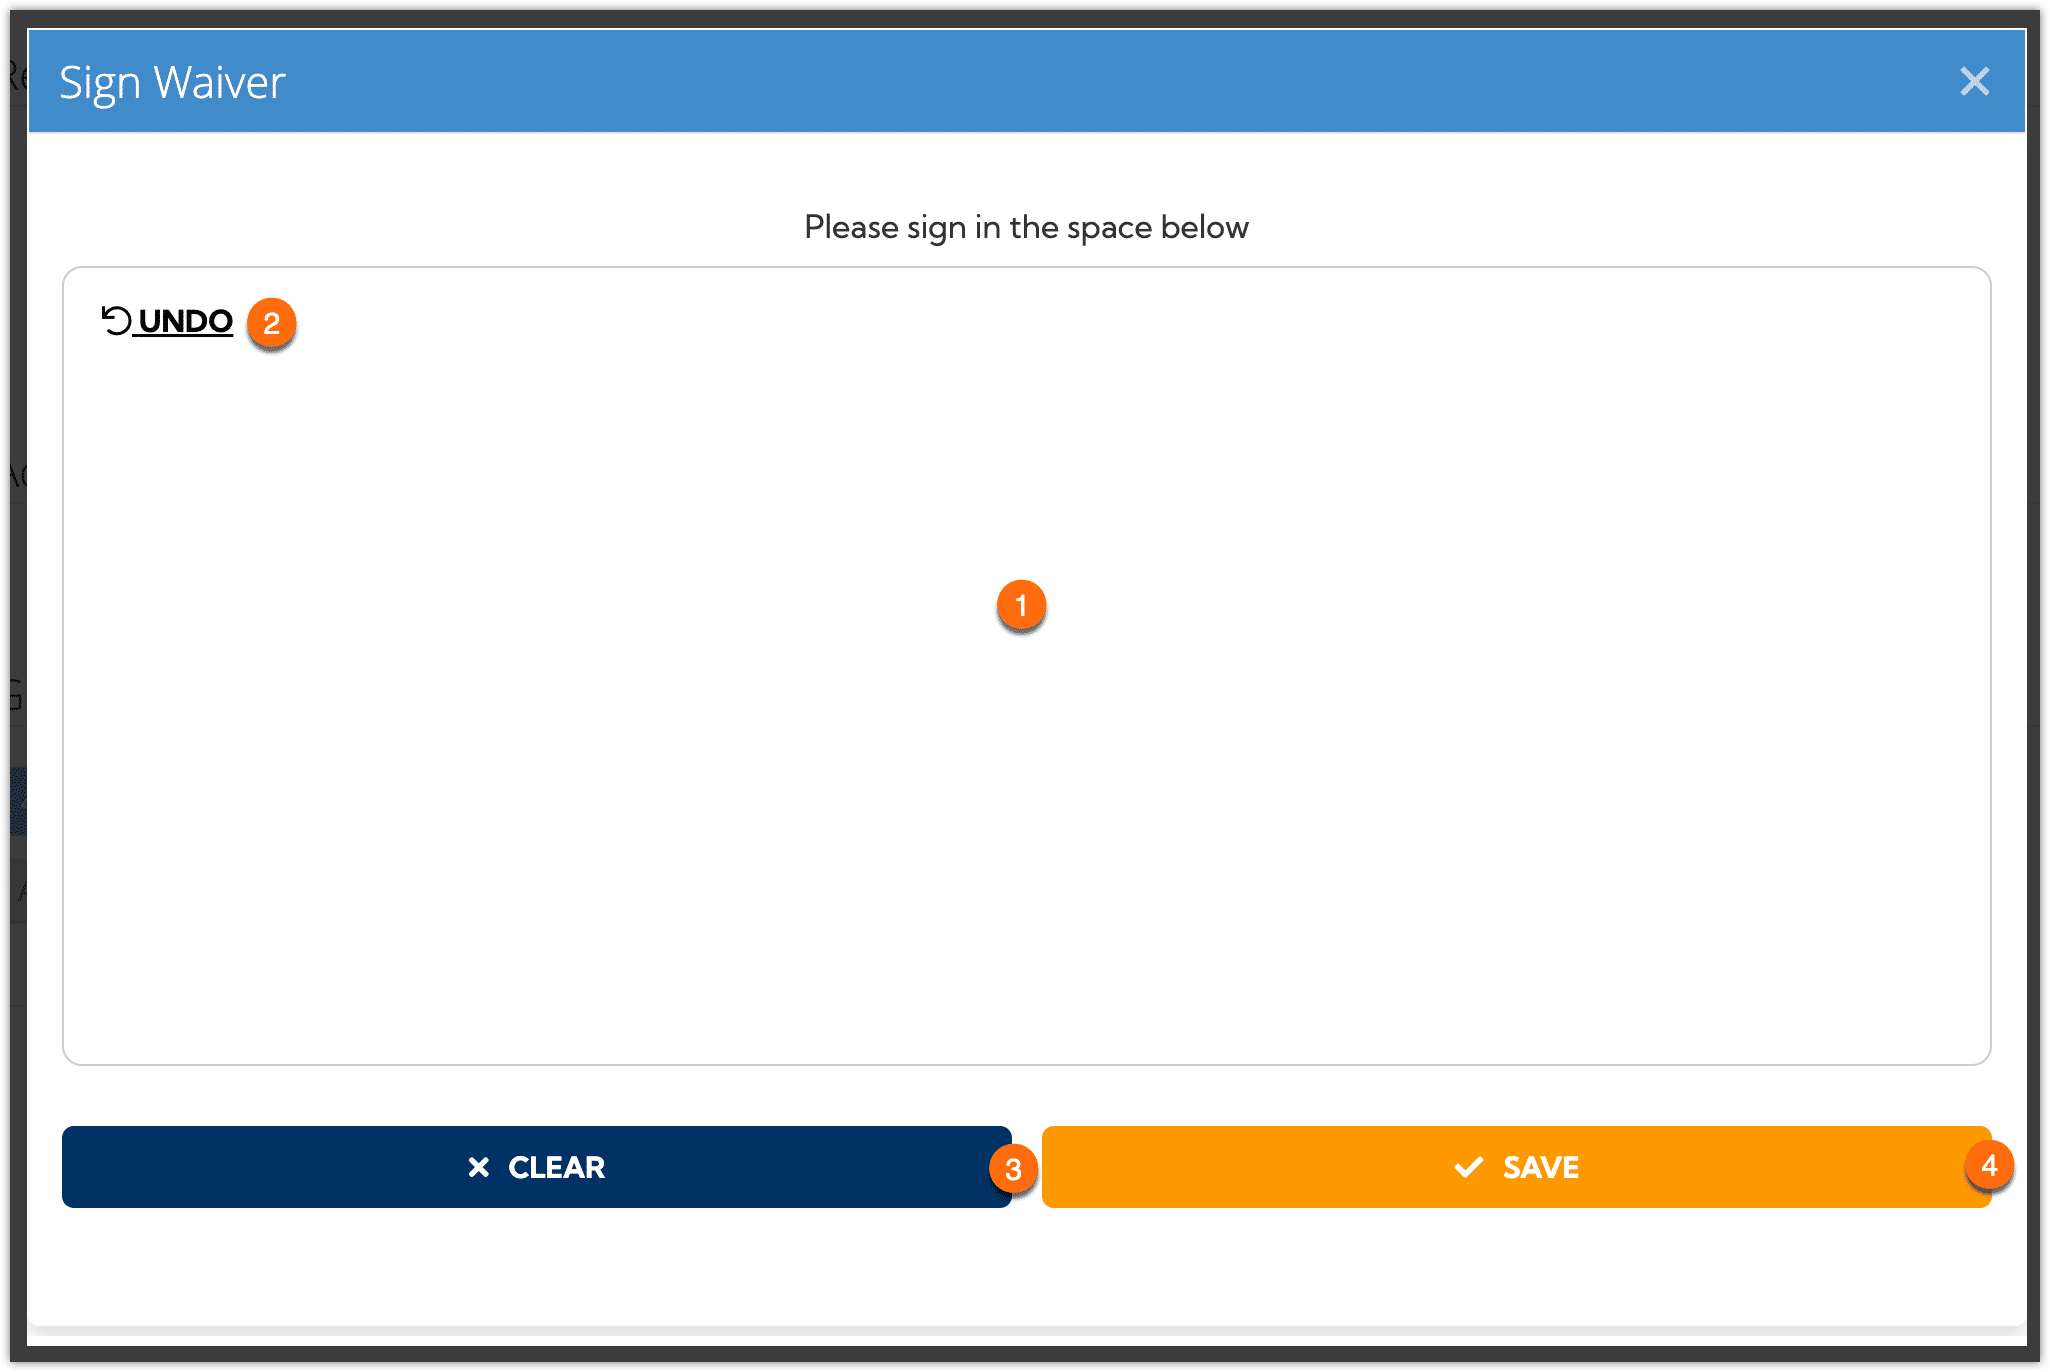
4. The customer can sign in the space provided (1). Depending on the device you’re using, they may sign with a mouse, their finger, or a stylus.
– If there’s an issue with the signature, the customer can click Undo (2) to remove the last stroke, or Clear to sign again (3).
5. Click Save (4).
Viewing, Printing and Re-signing Waivers
Once the waiver has been signed, you can view, re-sign or print it. Follow the instructions at this link.


